Our to train your typing skill with our free online games such as <<< ALIEN SMASH or ASTEROID SMASH >>> where you must type Russian words quickly to defeat the Aliens or destroy Asteroids. Or just practice your typing with <<< RUSSIAN TYPING PRACTICE >>> and see your words per minutes. These games are for desktop users.
LEARN RUSSIAN WITH OUR FREE ONLINE GAMES
 |
 |
 |
We will show you how to add a Russian keyboard layout to Windows 10, 11, and macOS.
Important note: You do not need a special keyboard to type in Cyrillic (Russian). However, if you have a keyboard with only Latin marked keys, guessing where to type may be challenging. In Russia, nearly all keyboards are dual-language, meaning they have both Latin (English) and Cyrillic (Russian) markings on every key. If you are outside Russia, you can still buy dual-marked keyboards from sites such as Amazon. MacBook users can also purchase keyboard covers that offer dual-language functionality.
Before coming to Russia, I bought keyboard covers for all my laptops. If you are planning to visit Russia but your trip is still some time away, you can start practicing now by getting either a keyboard or keyboard cover. Additionally, you can use a virtual on-screen Cyrillic keyboard as a temporary solution.

Adding a Russian keyboard layout to Windows
Windows 10:
– Open the “Settings” app by clicking on the Start menu and selecting the gear icon.
– In the Settings app, click on “Time & Language.”
– Select “Language” from the left-hand menu.
– Under the “Preferred languages” section, click on the “+ Add a language” button and search for “Russian.”
– Select the Russian language pack and click on the “Next” button.
– Choose the Russian keyboard layout you prefer (e.g., “Russian – Mnemonic”), and click on the “Next” button.
– Review the settings and click on the “Install” button to install the Russian language pack and keyboard layout.
– After installation, click on the “Options” button next to the Russian language in the “Preferred languages” list.
– Under the “Keyboards” section, click on the “+ Add a keyboard” button.
– Choose the Russian keyboard layout you installed (e.g., “Russian – Mnemonic”) and click on the “Add” button.
– You can now close the Settings app.
Windows 11:
– Open the “Settings” app by clicking on the Start button and selecting the gear icon.
– In the Settings app, click on “Time & Language.”
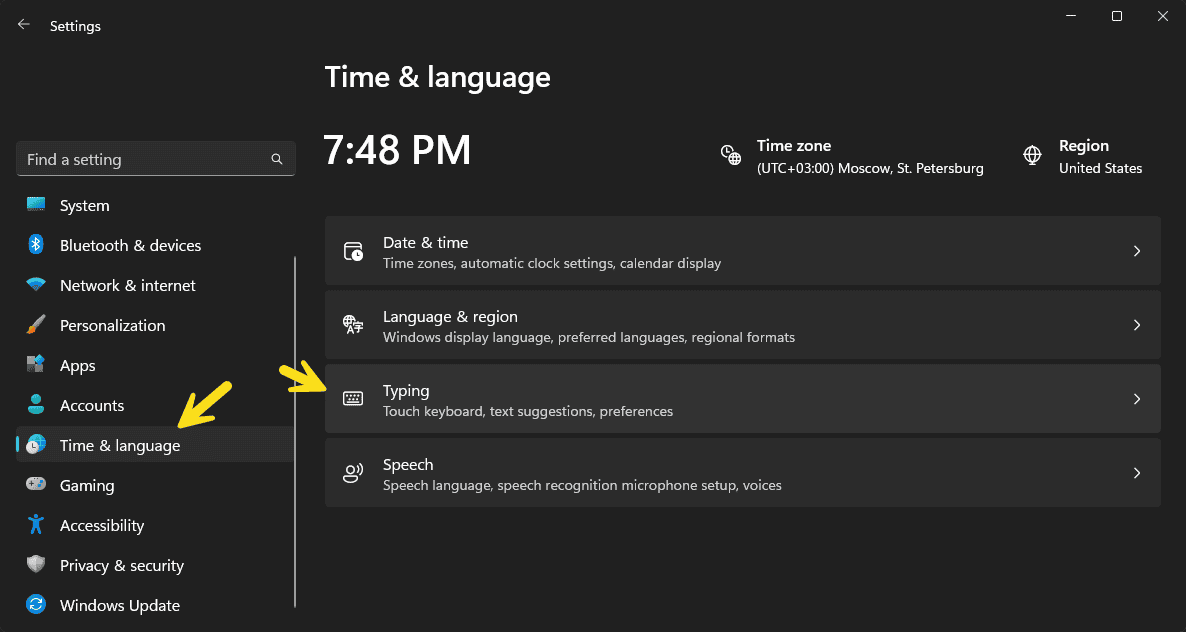
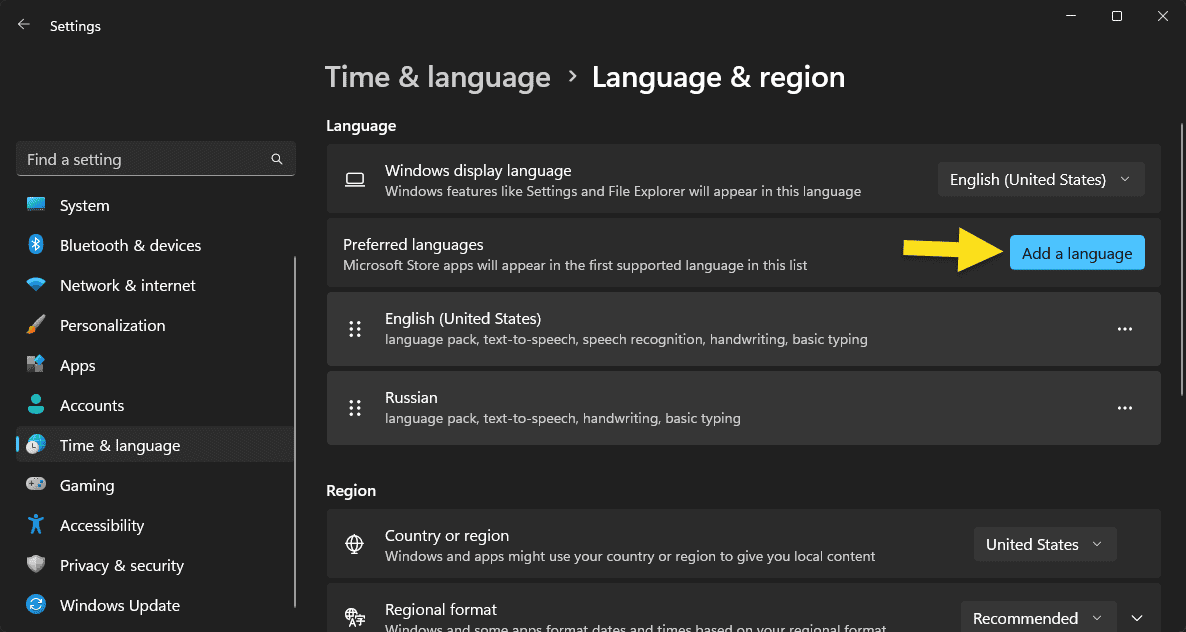
– Select “Language & region” from the left-hand menu.
– Under the “Language” section, click on the “+ Add a language” button and search for “Russian.”
– Select the Russian language pack and click on the “Next” button.
– Choose the Russian keyboard layout you prefer (e.g., “Russian – Phonetic”) and click on the “Next” button.
– Review the settings and click on the “Install” button to install the Russian language pack and keyboard layout.
– After installation, click on the “Options” button next to the Russian language in the “Language” section.
– Under the “Keyboards” section, click on the “+ Add a keyboard” button.
– Choose the Russian keyboard layout you installed (e.g., “Russian – Phonetic”) and click on the “Add” button.
– You can now close the Settings app.
Switching between keyboard layouts on Windows:
– After adding the Russian keyboard layout, you can switch between the standard US keyboard and the Russian keyboard using one of the following methods:
Method 1: Language Bar
– Look for the language bar on the taskbar. It typically appears as two capital letters representing the current keyboard layout (e.g., “EN” or “ENG” for English or “RU” or “РУС” for Russian).
– Click on the language bar, and a list of available keyboard layouts will appear.
– Select the desired layout (e.g., “RU” for Russian) from the list, and the keyboard layout will switch accordingly.
Method 2: Keyboard shortcut
– Press the Windows key + Spacebar simultaneously to cycle through the available keyboard layouts.
– Keep pressing the shortcut until you reach the desired layout (e.g., Russian).
That’s it! You should now be able to add a Russian keyboard layout to Windows 10 or 11 and easily switch between the standard US keyboard and Russian keyboard layouts.
Adding a Russian Keyboard Layout to Mac OS
Here's a detailed explanation on how to add a Russian keyboard layout to macOS and how to switch between the US and Russian keyboard layouts/
How to add a Russian Keyboard Layout for Mac OS:
- Click on the Apple menu in the top-left corner of your screen.
- Select “System Preferences” (or “System Settings” in newer macOS versions).
- Click on “Keyboard” (you might need to click on “Language & Region” first in newer versions).
- Go to the “Input Sources” tab.
- Click the “+” button in the bottom-left corner of the window.
- Scroll down or use the search bar to find “Russian”.
- Select “Russian” or “Russian – PC” (depending on your preference) and click “Add”.
The Russian keyboard layout is now added to your Mac.
Switching Between US and Russian Keyboard Layouts on Mac:
There are several ways to switch between keyboard layouts:
-
Menu Bar Method:
- Look for the flag icon or language abbreviation in the menu bar (top-right of the screen).
- Click on it and select the desired layout (e.g., US or Russian).
-
Keyboard Shortcut Method:
- By default, you can use “Control + Space” or “Command + Space” to cycle through your enabled input sources.
- To change this shortcut: a. Go back to System Preferences > Keyboard > Shortcuts tab. b. Select “Input Sources” on the left. c. Modify the shortcuts for “Select the previous input source” and “Select next source in Input menu”.
-
Caps Lock Method (optional setup):
- In System Preferences > Keyboard > Input Sources.
- Check the box that says “Use the Caps Lock key to switch to and from [your last used input source]”.
- Now, pressing the Caps Lock key will toggle between your primary layout and the last used alternative layout.
-
Customize your menu bar:
- In System Preferences > Keyboard > Input Sources.
- Check “Show Input menu in menu bar” to ensure the language icon is always visible.
Mac and the letter Ё / ё
For some unknown reason the letter Ё / ё is not a typical key available directly on the keyboard. Instead you can use the method below to type the “ё” letter. Even if you attach an external keyboard that shows the “ё” you still must use this method.
To type the character “ё” on a Mac by long-pressing the “е” key, you can follow these steps:
- Open a text field where you want to type.
- Press and hold the “е” key on your keyboard.
- After a moment, a small menu will appear showing various accented versions of the letter, including “ё”.
- Select “ё” from the menu by either clicking on it or using the number key that corresponds to it.
This method takes advantage of the Mac’s built-in feature that allows users to access special characters by holding down the corresponding key. This is particularly useful for typing letters with diacritics in various languages.
Mac OS Tips:
- The Russian-PC layout mirrors a standard Russian keyboard, while the Russian layout is optimized for Mac.
- You can rename your input sources or remove unused ones in the Input Sources preferences.
- To type in Russian, switch to the Russian layout and start typing. The keys will now correspond to Russian characters.